What is the ISO in photography? - Midnuances

What is the ISO in photography?

COMPLETE GUIDE - How to take better photos in dark environments


UPDATED August 2023

Reading time: 10 minutes

Diversi valori iso per fotografia

Share the guide:

Tell me if this scenario sounds familiar to you: You're trying to take a beautiful shot in a dark or poorly lit environment. You take the photo, press the button excited to see the result and...pitch black.


Don't worry... it's happened to everyone.

Unless the photo came dark because you forgot to remove the lens cap (this happens too), there's a perfect solution to add more light to your photos, and it's called ISO.


But what is it? How do you use it? What are the PROs and CONs of using the ISO?

Let's find out!


Ready, set, GO!

Note: At the bottom of the page you'll find the ISO Super-Quick Guide. Download it and take with you on your photographic adventures. It's free :)


1. What is the ISO?

ISO is one of the 3 key parameters in any photo. These 3 parameters, when combined, are called the Exposure Triangle: Aperture, Shutter speed & ISO.

Triangolo dell'esposizione fotografica

The shutter speed represents the period of time during which the camera sensor 'sees' the scene. It can range from an extremely long time (or at least until the camera catches fire) to a very short time - 1/8000s (one eight-thousandth of a second).


The aperture allows you to decide two things:

1. How much light to let into the lens, and therefore how much light reaches the sensor.

2. How blurred the background will be.


The wider the aperture the more light will enter the lens and the more blurred the background will be.


The narrower the aperture the less light will enter the lens and the less blurred the background will be.


ISO is the sensitivity of the camera's image sensor to light. Imagine ISO as the volume dial on a radio.

Turning the dial down will result in quieter music.

Conversely, turning the dial up will make the music louder.


The same principle applies to ISO.

Lowering the ISO reduces the sensor's sensitivity to incoming light.

Raising the ISO increases the sensor's sensitivity to incoming light.


The ISO values start from 100(or 50 in more expensive cameras) and can go up to 25,600 and beyond. On most cameras it goes up to 6,400 or 12,800.


You can use a value of your choice or you can set it to AUTO and let the camera decide the appropriate value. Of course, what the camera things is the right choice, might not be the right one for you.


2. Why use ISO?

But why should you use the ISO, when both the aperture setting and the shutter speed control the brightness of a photo?


Yes, you're absolutely right. But consider the following scenarios:


   1. You're taking a photo of a person and you want the background to be in focus, like in the photo below:

Ragazzo posa davanti ad una montagna - ISO fotografia

If you had opened the aperture too wide, you would have indeed had more light in the photo, but as a consequence, the mountain would have appeared blurred (wide aperture = more light + blurred background)


   2. You're capturing a photo of a soccer player in action, and naturally, you don't want everything to appear blurred and "shaky":

Portiere si lancia - ISO fotografia

With a slow shutter speed you would have obtained a brighter photo because the sensor would have "seen" the scene for a longer period of time, thus collecting more light.


The issue is that by observing the scene for a longer time, it would also have captured anything that was in motion. Consequently, the goalkeeper would have appeared blurry and shaky.


The ISO is a lifesaver when you want to get more light and don't want this to have an undesired impact on the other two parameters: aperture and shutter speed.


ISO setting on a DSLR camera

Impostazione ISO su una fotocamera Canon

Start your free trial

Learn photography fundamentals FOR FREE.

Study online with unlimited support, put everything you learn in practice with tons of exercises & assignments and connect with the other students.


Start your free trial now.

No credit card required


3. How to use the ISO?

For example, let's say you're taking a photo during sunset. The light is already becoming dimmer and the camera isn't able to see as well as our eyes, so you need to increase the ISO value.


Depending on the result you want to achieve, you might raise it to 800 o 1600.

Here's a practical example of how it would affect the final result:

Esempio valori ISO su fotografia

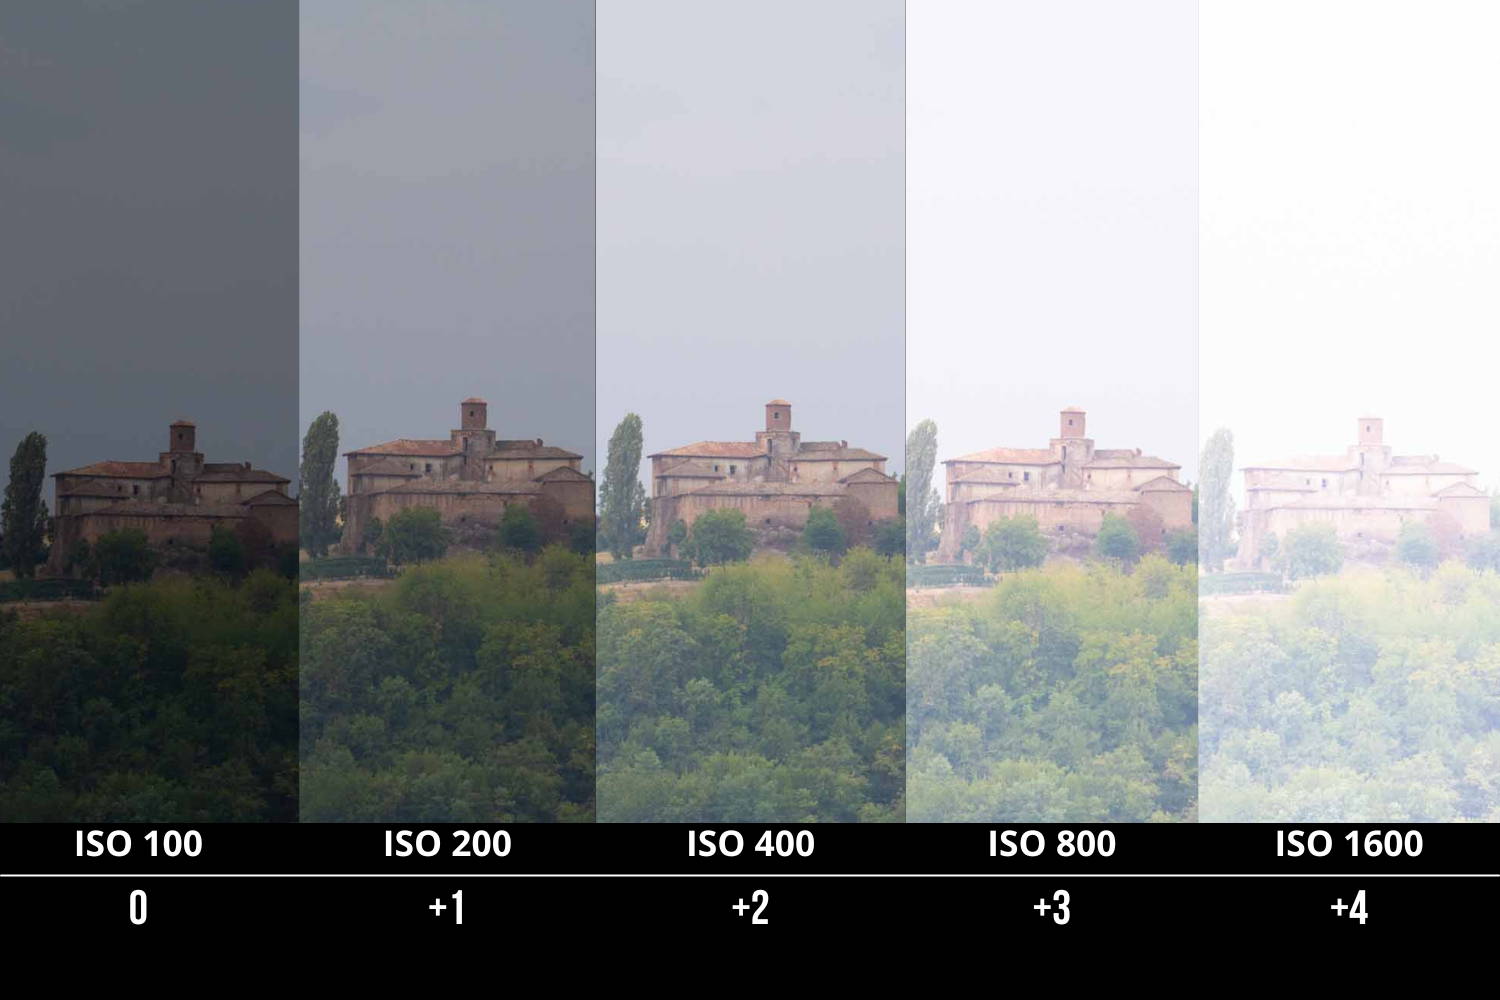
Notice how the increments of the ISO value are always double the previous value. In other words, you will never find an ISO value of 537.


The +1, +2, +3, below indicate the STOPS. In photography, a STOP refers to doubling or halving a certain parameter. For instance, if I were looking at one of your photos and noticed that it needs double exposure in order to be well-balanced, instead of saying "increase the ISO from a value of 400 to a value of 800", I could simply say "increase the ISO by one STOP".


The STOPS are photography's universal language and proves highly useful in chaotic scenarios where there's no time to list all the values of every parameter, like fashion shootings with tens of photographers, models and assistants.


But the ISO isn't only useful in low-light conditions; it can be extremely useful in situations with excessive light as well.


Imagine you're taking a photo under the hot midday sun. You've already set the shutter speed to the maximum value, the aperture is fairly closed, but the photo still appears overexposed.

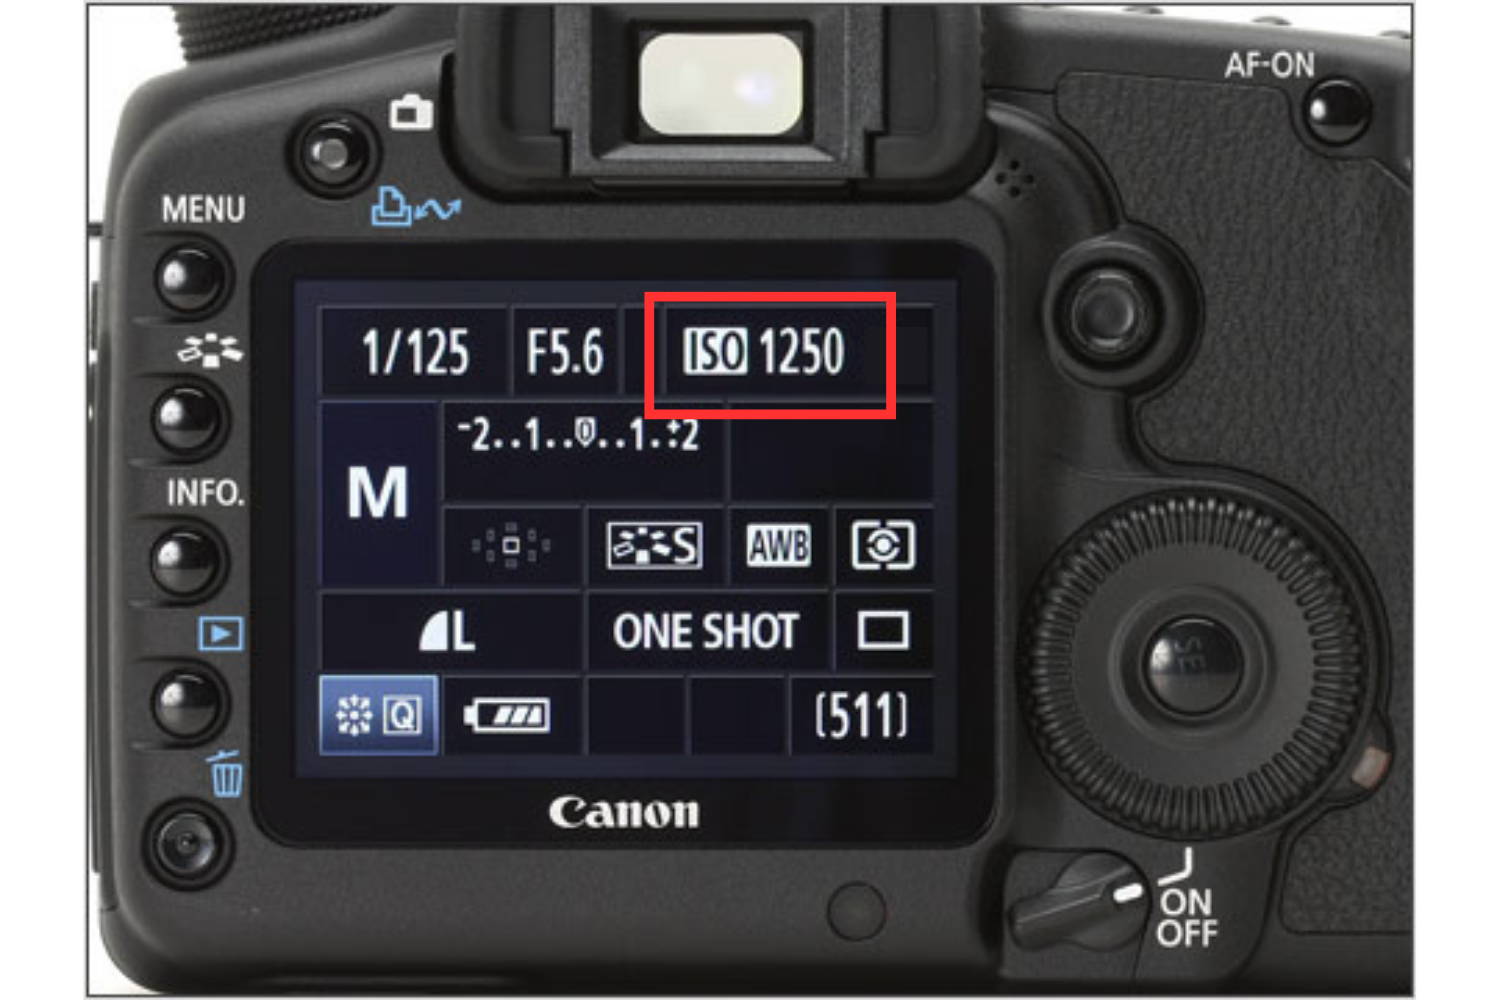
You check the settings and realize that the ISO is set to 800. Oops!


You now can decrease the ISO to the minimum value, like 100 or 50, and voilà! You'll most likely be able to take a good photo even in super-bright scenarios.


But what if even after setting the minimum ISO value, the photo is still too bright?


   1. Seek shade, cause you're about to get roasted buy the sun.

   2. Use an ND filter (Neutral Density). It's a filter designed specifically to block a certain percentage of the light that hits it. But that's a topic for another guide.


4. Digital noise

ISO has lots of PROs, but one main CON:

It's called digital noise.


When you raise the ISO value too much, you're essentially telling the camera:

"Hey, the scene is pretty dark. I need you to tell your sensor to be more sensitive to the available light, so it can capture it more easily."


However, when you go overboard with the chosen value or find yourself in REALLY low-light conditions, the camera will do a bit of guesswork.

It will try to add brighter pixels in places where it thinks they might come in handy. This results in digital noise, as seen in the photo on the right below:

Rumore digitale a causa di un valore ISO troppo alto

Naturally, the digital noise problem varies from camera to camera, and while some can reach extremely high ISOs without a single pixel out of place (those are usually the ones that cost quite a bit, but you already knew that), others start producing digital noise even at an ISO value of 1600.


Even though a camera can reach super-high ISO values, it doesn't necessarily mean that these values will translate into excellent photo quality.


Just as speakers can reach a volume that blasts your eardrums, it doesn't mean that the sound will be smooth and pleasant. In fact, it's quite likely to be pretty messy.


Digital noise can be easily treated in post-production, but only if the photo was taken in RAW format. If you shot it in JPEG format, you will still be able to get rid of some of the noisy pixels, but the results will never be as good as if it was a RAW.


That's because the RAW format is a lossless file format, which means it doesn't eliminate nor compress any of the data that composes the image.

JPEG is a lossy format, which means a big chunk of the data that composes the image will be eliminated due to the compression algorithm.


CONCLUSION:

1. What is the ISO in photography?

ISO in photography indicates the sensitivity of the sensor to the light it receives.

A low ISO value is ideal in situations with bright light, while a high ISO value might be the good choice in situations with little light available.

2. When to use different ISO values?

Using ISO values to adjust the exposure of a photo is useful in all those situations where altering the values of the shutter speed or the aperture is not possible.

3. What is  digital noise?

Digital noise in photography is an unwanted distortion that appears as white or colored dots in the image. Digital noise is often caused by a too high ISO value.

Download the ISO Super-Quick Guide and take it with you on you photography adventures!


Click/tap on the photo to download it


✅ Safe file

Infografica - Guida ISO in fotografia

Start your free trial

Learn photography fundamentals FOR FREE.

Study online with unlimited support, put everything you learn in practice with tons of exercises & assignments and connect with the other students.


Start your free trial now.

No credit card required

Write a comment or ask us questions:

By pressing the button above you accept our Privacy Policy